Translate

Total Pageviews

Showing posts with label Canada food blogger. Show all posts

Wednesday, 8 June 2016

Chicken Bean Burritos

A great hearty lunch or for the dinner on the go. As moms (or dads) we are always on an itinerary with our children. Dance classes, soccer, hockey games. Make this ahead and freeze it. Defrost in the morning so it's ready for dinner. When you get home, place it in the oven to heat through or microwave; and away you go!


Chicken Bean Burrito

Chicken Bean Burrito

Ingredients

3/4 cup brown rice

2 tbsp. olive oil

1 small onion chopped

1/2 red pepper, seeded and chopped

1 lb. ground chicken

1/2 tsp ground cumin

1/2 tsp chipotle chili powder

salt and pepper to taste

3 tbsp. tomato paste

1 can 19 fl. oz. (540 ml) black beans

1 cup frozen corn kernels

1 1/2 cups shredded cheddar cheese

8 burrito-size whole wheat tortillas, 10 inches each

Salsa and sour cream (optional)


Cook rice your brown rice and set aside.

Heat the oil in a large sauce pan over medium and add the onions, garlic, pepper, cumin, salt and pepper. Sautee until translucent, add the meat and continue to cook until the meat has browned.

Add the tomato paste and cook, for 1 minute. Make sure you're stirring while this is cooking.


Add the tomato paste cook for about 1 minute


Add the beans, and 1 cup of water; bring to a boil, reduce heat and let simmer, stirring until thickened (approx. 15 min.)

Add the beans and water and simmer until thickened


Add the corn and cook to heat through for about 5 minutes. Remove from heat.

Add corn and heat through. Remove from heat.


Heat the tortillas according to the package. Then fill with the rice, and bean mixture. Add the cheese. The filling must be placed on one side of the tortilla. Fold sides, and hold the sides together and roll tightly into a bundle.

Serve with salsa and sour cream.

If you are freezing the burritos, wrap the burrito individually and place in the freezer.


Tuesday, 31 May 2016

Homemade Granola Bars

My children love granola bars. But if you look at the package, it's loaded with sugar. If you have a child that is allergic to nuts, this recipe is perfect and is also gluten free. I like making my own granola bars. It's not that difficult to make and much healthier. This recipe is not that sweet. The applesauce adds a nice chewy texture to the bar.

Make sure the bars have completely cooled down before you cut into squares.


Homemade Granola Bar, gluten and nut free


Homemade Granola Bars

Preheat oven to 350 degrees oven. Line a 8x8 inch square pan with parchment paper


2 cups         rolled oats

1/2 cup        packed brown sugar

2 tbsp.         unsalted butter

1/4 tsp.        salt

1/2 cup        unsweetened applesauce

1                  large egg

1/3 cup        pumpkin seeds

1/3 cup        chopped dates or raisins

2 tbsp.         chia seeds


Mix the oats, brown sugar, butter and salt until the butter is evenly blended. Sitr together the applesauce and egg. Add to the oat mixture along with the pumpkin seeds, dried fruit and chia seeds; stir until mixture is moistened.

Spread and press mixture into your 8 x 8 inch parchment lined pan. Bake for 25 minutes or until golden. Remove from oven and let cool completely before cutting.

Sunday, 29 May 2016

A Time For Celebration

There's two times in a year that our family totally goes stupid with celebration. The months of May and November are the busiest times of the year to celebrate birthdays. We have four family members celebrating birthdays in May and 3 family members celebrating in November. The rest of the family are scattered, thank God. Birthdays are very important to me and my family. It's a time to get together with family and celebrate. The gifts are not the main focus. It's the quality time that we spend together. We have a nice meal and catch up. Our lives are so busy, that communicating with each other isn't done enough. Wow. I know but it's reality.

So, I went on a field trip again. My family and I went to a beautiful restaurant north of Toronto called Farro Ristorante.  This restaurant is our family favorite. When there's a special occasion, we always come here to celebrate. The professional, knowledgeable, friendly staff truly make us feel comfortable and at home. The rustic décor reminds me of an old style restaurant back in Italy.

Classic memorabilia displayed throughout the restaurant along with specialty pastas, sold for you to take home. Their wood burning oven truly makes your pizza eating experience the ultimate.

Just a small sample of their wine collection

While we wait for our meal, we have some fresh bread with olive oil and balsamic vinegar

Homemade hummus spread - so delicious and creamy!

Olive oil and balsamic vinegar

We all had a carbfest for dinner. Enjoying their signature pizzas. My dad chose their delicious  mushroom risotto.

This was my pizza. Massimo’s Pizza Bianca- New Potatoes, Caramelized Onions, in house Smoked
Pancetta & Mozzarella. Lord have mercy!

Quattro Stagioni with Prosciutto Cotto, Artichokes, Mushrooms, Olives, D.O.P.
Tomato Sauce & Mozzarella - Blessed!

The pizza had a thin, crispy crust that was perfectly cooked. This is true authentic pizza ladies and gentlemen. Old school, traditional Italian food at it's finest. Made with fresh ingredients. You can really taste the difference.

Risotto ai Funghi- Italian Rice with Mushrooms, Parmigiano & Truffle Essence

The ambiance in this place is truly amazing. So, once we were done dinner, we headed over to my mom's for some after dinner drinks, cake and coffee to cap off the evening!

Some spumante to toast.

Lemon Yogurt Birthday Cake - Divine!


And of course my cappuccino!


An evening full of good food and laughter. Who needs gifts! The opportunity to share some laughs, eat good food and relax is the ultimate gift a person can ever have.

Wednesday, 25 May 2016

Granola Bites

A quick and easy recipe for snacks. You never know what packaged granola at the store is made of. I like to make my own so I know what we are eating. The crisp rice cereal adds a nice crunchy texture.

Another recipe hit in my house. And no baking required.

Granola Bites

Granola Bites

1 cup              mixed dried fruit (raisins, abricots, cherries, chopped dates)
1/2 cup           raw sunflower seeds, shelled
1/2 cup           raw pumpkin seeds
7 cups            crisp rice-cereal
1 cup             quick oats
1 1/2 cups     chunky peanut butter   
1 cup             light corn syrup
1/2 cup          brown sugar
1 cup             dry instant nonfat dry milk
1 tsp              vanilla extract

Grease 15x10 inch pan

Combine dried fruit and seeds in food processor, cover. Pulse to chop into small pieces. Transfer to large bowl. Add rice cereal and oats, mix well.

Combine peanut butter, corn syrup and sugar in small, microwave-safe bowl. Microwave on HIGH until bubbly about 1 minute. Remove from microwave and stir in dry milk and vanilla extract. Pour peanut butter mixture over cereal mixture. Stir well to coat. Let cool completely before shaping into balls. Store in air tight container.

Monday, 16 May 2016

Penne With Peas and Mushrooms

This dish is easy and quick to make. If you're a soccer mom, this would be a great pre-game meal that is quick and easy to make.  If you like spicy, add a bit of hot pepper flakes. Also nice with rice or gluten free pasta.

Penne with Peas and Mushrooms

Penne With Peas and Mushrooms

1 garlic clove, minced
1/2 small onion, finely chopped
2 cups chopped mushrooms
1 cup frozen peas
Salt and pepper to taste
1 pkg, cooked penne
4 tbsp. olive oil
hot pepper flakes, optional

Once the pasta has cooked, reserve 1 ladle of the pasta water for later.

Sautee the onion and garlic with the olive oil until golden. Add the mushrooms and continue cooking for about 8 minutes.


Sautee the mushrooms until cooked


Add the frozen peas to the mushrooms and continue cooking

Add the cooked pasta and the reserved water and continue cooking for another 5 minutes

Serve With Parmesan Cheese 

Sunday, 15 May 2016

Cheesy Pancakes


There's one thing I love about Sunday morning is breakfast! My most favorite meal of the day! I made these pancakes this morning for my family. It is moist and oh so delicious. The pancakes secret ingredient is cottage cheese which makes the pancakes so moist. I served the pancakes with a blueberry preserve that I make when it's blueberry season. Maple syrup is just as delicious.

Pancakes Made With Pressed Cottage Cheese


Cheesy Pancakes

1 lb of pressed cottage cheese
1 1/2 cups of all purpose flour
2 eggs
pinch of salt
1/4 cup of raisins
1/4 cup of vegetable oil
1 tsp cinnamon
1/4 tsp nutmeg

Mix thoroughly the cheese, eggs and salt.
Add the rains and mix again.
Slowly add the flour and mix. Mixture should be sticky.
Add the dough to a floured surface and cut into balls approx. 2 inches and then flatten.
Add butter to a griddle and cook the pancakes.

Serve with fruit preserves or maple syrup.

Saturday, 14 May 2016

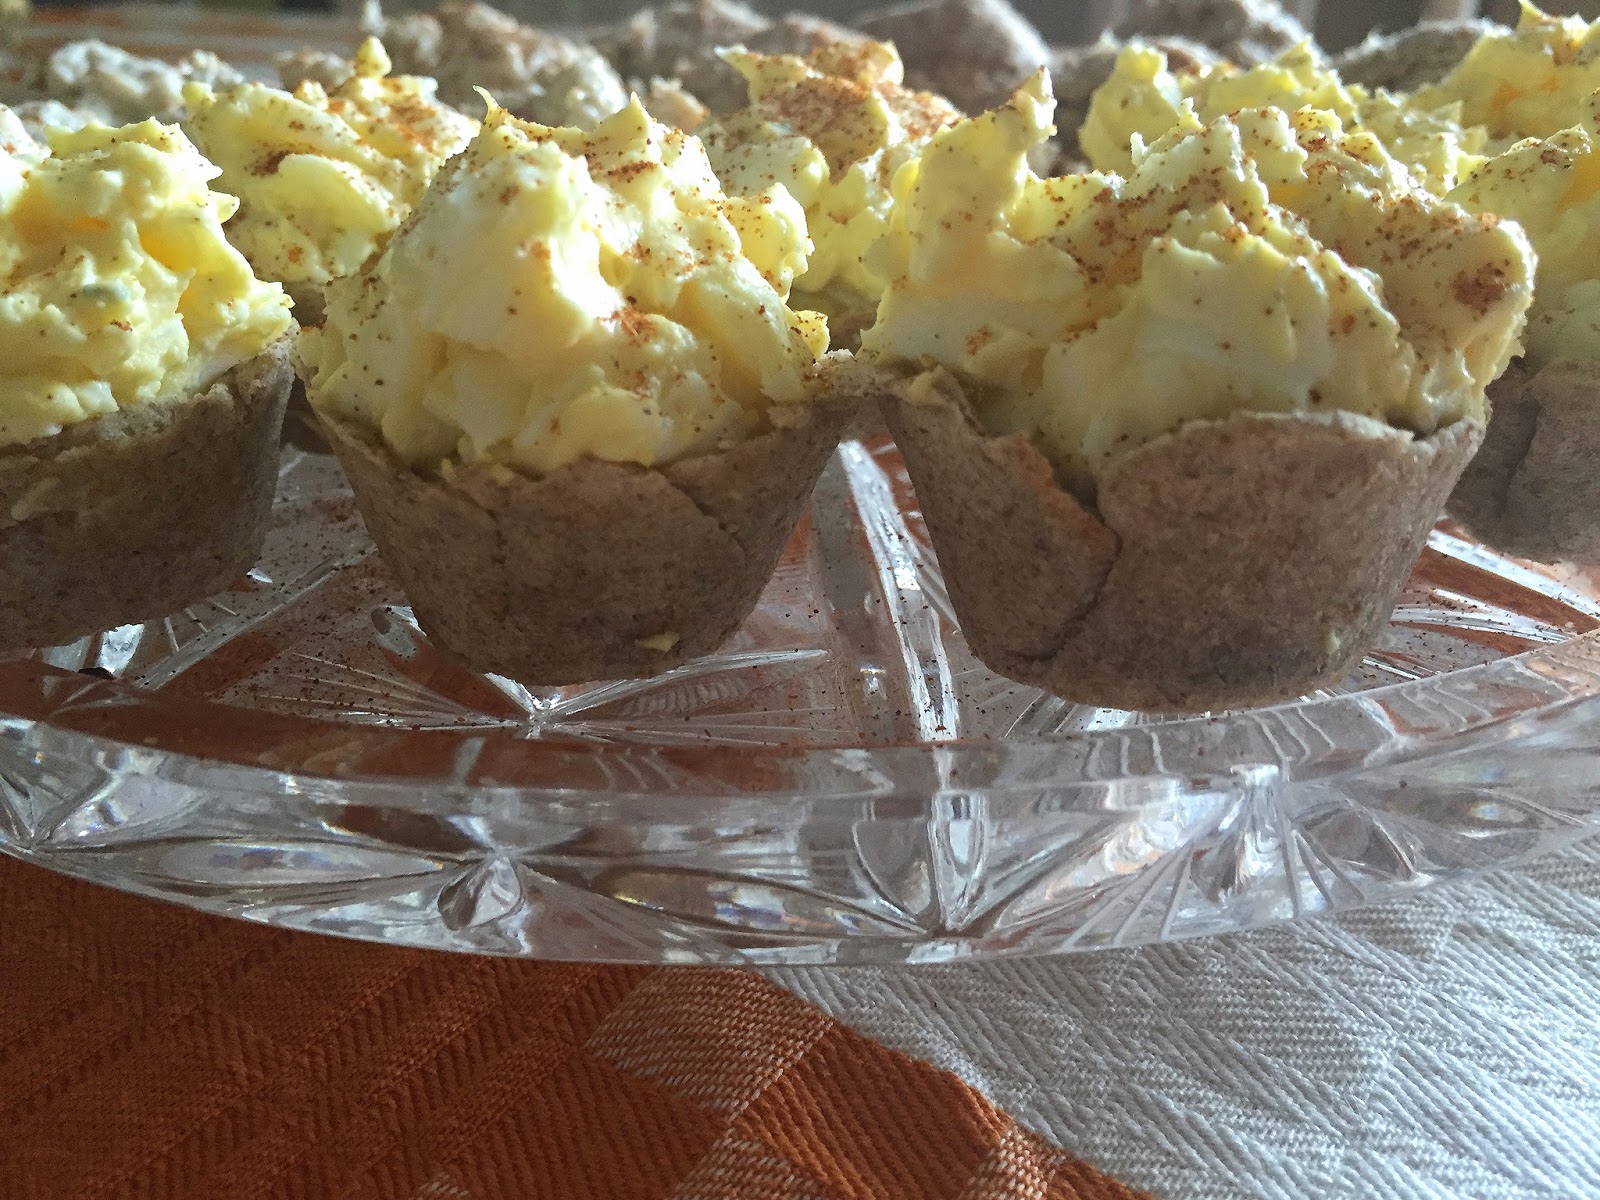
Bite Size Appetizers A Stylish Alternative to Finger Sandwiches

Bite Size Appetizers


I made the above appetizers for my little nephew's birthday party. Bread cups filled with chicken, egg and tuna salad. Very easy to make. The bread cups can be made the night before or a few days before and filled the last minute.

This would really be cute if you're hosting a bridal or baby shower or afternoon tea with the ladies! A stylish alternative to finger sandwiches.

You will need:

A loaf of toast bread (I used whole wheat - the softer the better to work with)
Any filling you wish I went to the local deli and bought their freshly made egg, tuna and chicken salad. I only needed a little so it wasn't feasible to make my own.
A rolling pin
Mini muffin tin

Preheat oven to 350 degrees F


Flatten the slice of bread with a rolling pin, remove crust


Cut bread in a circle with a cutter (I used a 3") to fit my tin

Grease the tins before lining with bread

Bake for 5 minutes, then close the heat leaving the cups in the oven. This will dry out the cups. After 30 minutes, remove from oven and continue cooling.

Your cups are ready to be filled


Friday, 13 May 2016

Decadent Ice Cream Pie


If you're intimidated with baking, why not try this recipe out. A delicious ice cream pie that is easy to make and great to make ahead for your dinner or event. Or just make this and savor for a cheat night!

Why not serve this at your next barbeque?


Vanilla Chocolate Crunch Ice Cream Pie

Crust:

1 1/4 cup Oreo Cookie Crumbs
1/4 cup melted butter

Press on bottom of 9 inch pie plate. Bake at 350 degrees F for 10 minutes. Remove from oven and let cool completely.

Pie Filling:

1 cup (6 oz) semi sweet chocolate squares, chopped

4 tbsp. unsalted butter

1/4 cup heavy (double cream)

2 tbsp. light corn syrup

1 cup confectioners (icing) sugar, sifted

1 tsp. vanilla extract

1/2 cup Skor bits

1L tub of premium vanilla ice cream

Melt the chocolate, butter. cream and corn syrup on top of a double broiler. Set over but barely touching the simmering water. Stir constantly until chocolate has melted.

Add the sugar and vanilla to the chocolate mixture and mix well. Reserve 1/2 cup of the chocolate for the pie topping. Spread the remaining on the cookie crust. Sprinkle with half of the Skor bits. Refrigerate for 1 hour.

In a large bowl, using a paddle attachment, beat the ice cream with an electric mixer until spreadable but not runny. Pour immediately into the prepared pie plate and freeze until firm (about 2 hours).

Microwave the chocolate in 30 second intervals until spreadable. Remove, stirring quickly and spread onto the pie. Sprinkle with the remaining Skor bits and freeze until completely firm before serving. If you are making this ahead, remove from freezer about 10 minutes before serving to make cutting easier.

* If you do not like toffee bits, substitute for chopped, roasted almonds.


Wednesday, 11 May 2016

Vegetable Beef Stew

I've been craving a good stew for a very long time. When I plan to make it the kids tend to sway me to make something else. Last night I decided to make this stew and it was vanished before you knew it! I like to make a little extra for lunch the next day, but unfortunately there was nothing left. The aroma of this stew is truly intoxicating. Even though stew is considered a winter comfort food, I love making this dish using farm fresh vegetables of the season. If you're a vegetarian, skip the meat. It's just as good.

Meat and Vegetable Stew With Brown Rice

Meat and Vegetable Stew With Brown Rice


1 can (14oz) pureed tomato or use fresh, tomato
250 gr. stewing beef
1 zucchini, chopped
2 small potatoes, peeled and cubed
3/4 cup mushrooms, sliced
1 bell pepper sliced into strips
1/2 onion finely chopped
1 tsp fresh parsley chopped
1/3 cup red wine
4 tbsp. olive oil
salt and pepper to taste

Steamed brown rice.

Directions:

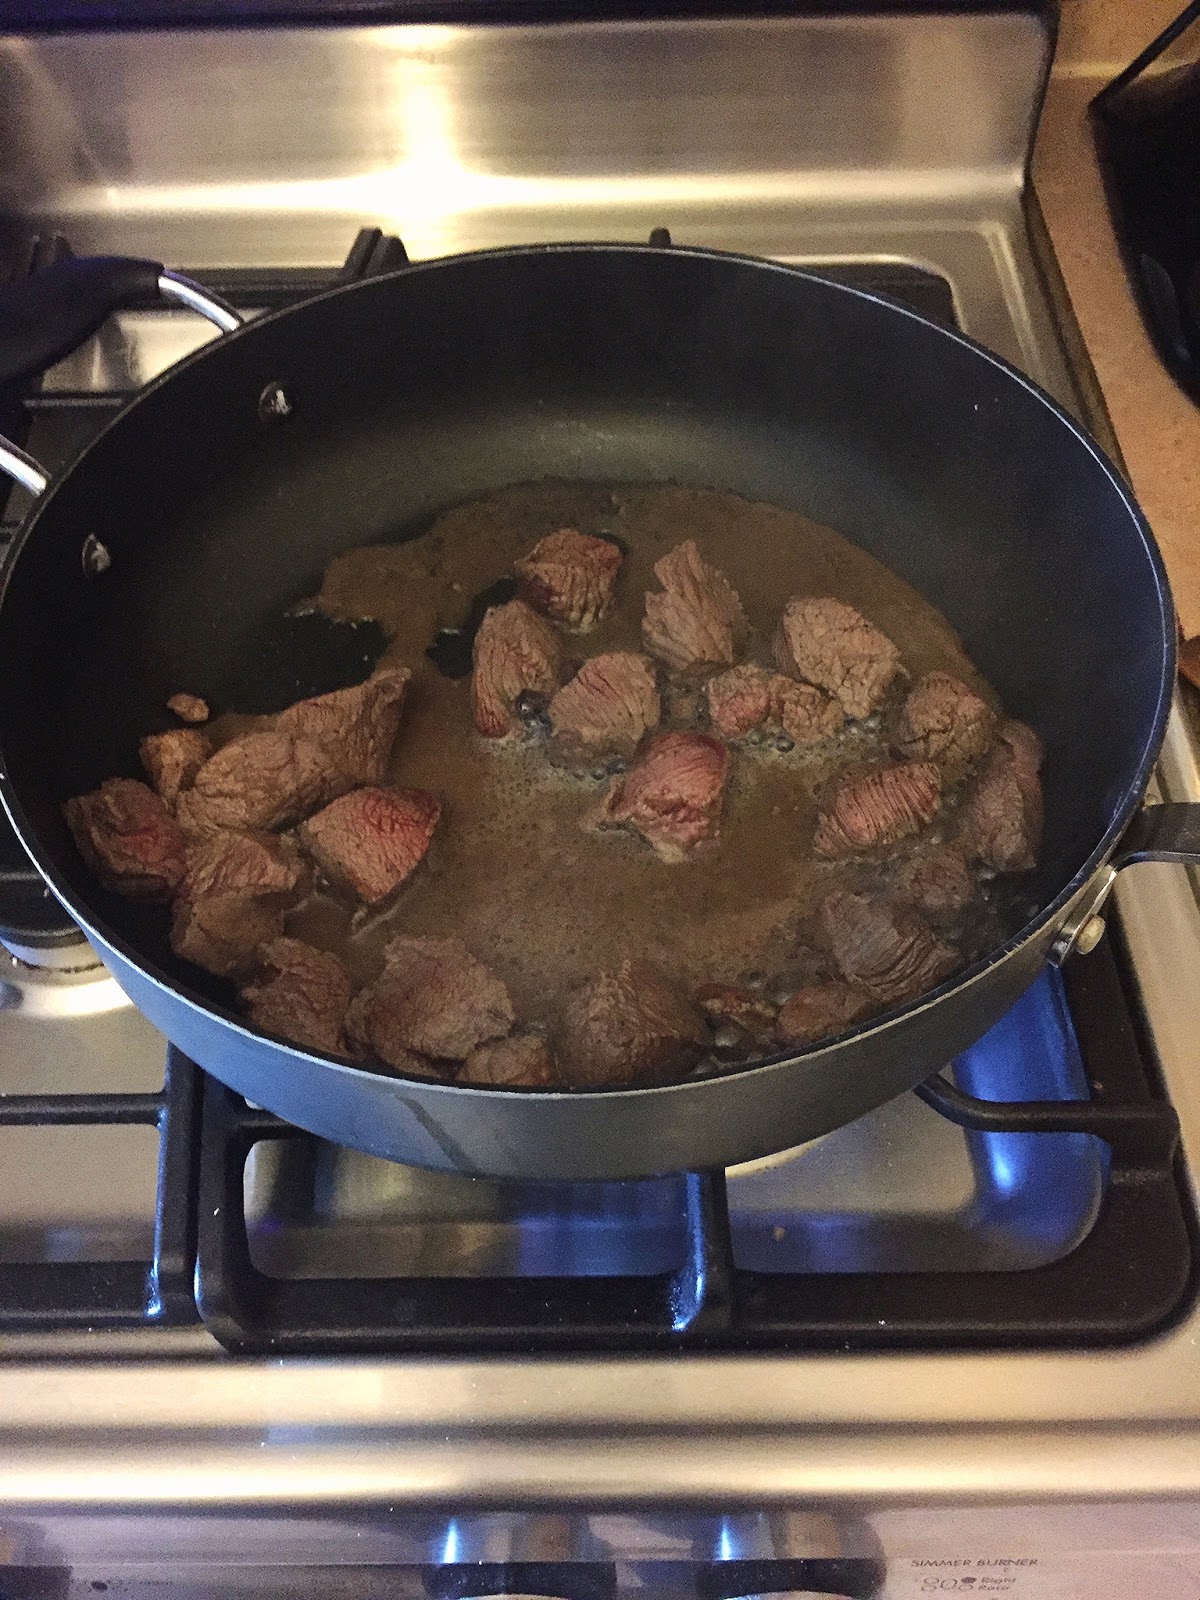
Sautee the meat and chopped onion with 2 tbsp. of olive oil until meat has browned. Add the red wine and let simmer for about 5 minutes. Add the potato, bell pepper, mushrooms and zucchini. Stir until softened. Now add the tomato, remainder 2 tbsp. of olive oil and parsley. Add about 1/2 tsp. each of salt and pepper. Taste and add more if desired. Slowly simmer the stew for a good 30 minutes or until sauce has thickened. Serve over steamed rice or eat it on it's own.

Meat sautéing in wine

Stew cooking with sauce 


Tuesday, 10 May 2016

Polenta Fries

Polenta considered northern Italy's peasant food back in the day has now become a gourmet item. Even though my parents are from the central part of Italy, polenta was served particularly in the winter months. My mother would serve hot polenta with a delicious tomato sauce topped with homemade sausages.

Today I converted this plain corn flour into delicious fries. The dipping sauce is made of homemade tomato sauce. Adding a little hot pepper would add a little zing to this dish.


Polenta Fries Served With Spicy Tomato Sauce


Polenta Fries

Preheat Oven to 425 degrees F

4 cups water, salted
1 cup polenta flour (cornmeal)
1 tsp dried rosemary
1/4 cup parmesan cheese
Pinch salt and pepper

Boil the water. Add salt and polenta stirring constantly. For about 20 minutes or until mixture has thickened.


Once the mixture has thickened, remove from heat and add the rosemary and parmesan. Stir until well incorporated. Spread onto a greased baking sheet.


Refrigerate the polenta until completely cooled. For about an hour. In the meantime, you can start making the tomato sauce.

1 can of tomato puree (14 ounces)
2 tsp olive oil
1 garlic clove
1/2 onion
1 tsp salt
1 tsp parsley
1/2 tsp hot pepper flakes

Simmer all the ingredients above in a pot on medium heat. Cook for about 20-30 minutes.

While the sauce is cooking, you can grab the polenta. Remove from pan and start slicing the polenta into fries. I dipped the wedges into rice flour to add more crispiness to the fries. You can use regular flour if you wish.


Bake the fries for about 25-30 minutes or until crispy; rotating the pan halfway through. Remove and sprinkle with more parmesan if you wish.

Healthy and gluten free!

Monday, 9 May 2016

A Natural Version to The Peanut Butter Cup

There's one chocolate that I absolutely love which is Reeces Peanut Butter Cups. The delicious chocolate complemented by the peanut butter is truly heaven. But not exactly great for my abs, butt and thighs. So I'll switch it up with this recipe. I'll pretend play with this healthy rendition of the peanut butter cup. Just as good but it is actually good for you. When you have that sugary, chocolate craving, keep a stash of these on hand. Even better eaten out of the freezer.

Using dark chocolate, natural peanut butter and banana. It truly makes a delicious treat. 

Banana Peanut Butter Cups


You will need:

1 banana, sliced

1/4 cup natural peanut butter or almond butter

2 tsp coconut oil

100g dark chocolate bar

small paper candy cups

Blend 1 tsp of the coconut oil with the peanut butter in a bowl and set aside

Melt the dark chocolate and 1 tsp of the coconut oil

Drop the chocolate in the cup approx. 1/2 tsp. add banana, then layer the peanut butter and top with chocolate.

I place the cups in mini tart tin tray to keep the shape of the cups.

Freeze for 20 minutes.

Store in an air tight container.

Friday, 6 May 2016

Quinoa Salad

Quinoa has been my go to grain. I make it for breakfast, and now I have created a salad recipe which is absolutely delicious. Great served as a side dish with fish or meat.


Quinoa Salad


Quinoa Salad

1 cup quinoa, cooked and cooled
1 small cucumber, chopped
2 chopped green onions
1 tomato, seeded and chopped
1/2 green pepper, chopped
1/2 cup sliced black olives
1/4 cup feta cheese


Dressing

juice of half a lemon
3 tbsp. olive oil
1/4 tsp. salt and pepper
1/2 tsp. greek oregano or regular oregano


In a small bowl whisk the lemon juice, olive oil, oregano, salt and pepper and set aside

In a larger bowl combine all the ingredients and stir in the dressing. Refrigerate before serving.

I would make this salad ahead of dinner or your event. The flavors will blend while refrigerated preferably overnight.


Thursday, 5 May 2016

Happy Cinco de Mayo!

Happy Cinco de Mayo to my Mexican friends! I wish you all the best on this festive day! I made this dip to commemorate this special day! It's easy to make and so delicious! A true crowd pleaser!


Salsa Layered Dip

Salsa Dip

1st Layer
1 8oz pkg. cream cheese
5 tbsp. sour cream

Whip together and spread over the bottom of a quiche type dish

2nd Layer
Use your favorite salsa. Spread it over the bottom layer.

3rd Layer
1 green pepper chopped
1 tomato chopped (discard juice)
2 green onions chopped

Sprinkle the chopped items over other two layers and lightly press it into the first 2 layers.

4th Layer
Grate about 10oz of old cheddar cheese to cover dip.

Serve with nachos.

Wednesday, 4 May 2016

Italian Peasant Cuisine - Cheese Balls

My parents were both born and raised in Italy. They come from the Abruzzo region. Abruzzo is approximately 2 1/2 hours northeast of Rome. My father comes from the outskirts of Pescara on the shoreline of the Adriatic Sea and my mother is from the outskirts of the city Chieti. Her little town is located at the foot of the Gran Sasso mountains. This recipe that I am featuring today is a classic poor man's cuisine dish. It is called pallotte cacio e uova. Which translates to egg and cheese balls. The original recipe calls for sheeps milk cheese. I've improvised by mixing parmegiano reggiano cheese to lessen the sharpness. By all means, if you enjoy the sharpness of pecorino cheese; go for it! The dough consists of stale bread, eggs and cheese. Very easy to make and tasty!

Pallotte Cacio e Uova a traditional poor man's dish from the Abruzzo region


Pallotte Cacio e Uova

Pallotte

Ingredients
100 grams of stale bread
2 cups grated pecorino cheese
1 cup parmesan cheese
1 garlic clove, minced
1 cup of milk
4 eggs
1 tbsp. minced parsley
vegetable oil
salt and pepper

Sauce:
400gr ripe tomatoes or sauce from the bottle
1 garlic clove, minced
1/2 onion
basil
3 tbsp. extra virgin olive oil
salt and pepper to taste

For the Pallotte

Soak the stale bread in the milk until completely softened. Squeeze out the excess milk.


soak bread in milk


Add the eggs, parsley, garlic, pinch of pepper and cheese to the bread mixture. Mix until well incorporated. Let rest in fridge for about an hour.


incorporate the rest of the ingredients and let rest

 
Shape into small balls and fry in vegetable oil on medium-high heat. Then place on a plate lined with paper towels to absorb excess oil.


ready to be fried


Sauce

In a large pan, heat the olive oil and sauté the minced garlic and onion. Add the chopped tomato or sauce from the bottle, and a glass of water. Let cook for about 10 minutes. Once the water evaporates, add some basil (I also add a little chopped parsley) and salt to taste. Cook for another 10 minutes, on medium heat. Make sure you stir constantly to prevent burning. Transfer the balls into the sauce and continue cooking for another 5 minutes.


Buon Appetito!


Tuesday, 3 May 2016

Roasting Peppers 101

In my family we try our hardest to keep the Italian tradition. My mom has continued to teach me cooking traditions that were taught to her when she was growing up. In the Fall, we usually buy a bushel of peppers at the local farm and  dedicate a day to roast our peppers outside on the barbeque. We have an assembly line to clean, season and preserve the peppers. We also cut up raw peppers, bag and freeze so we have peppers readily available and at a fraction of the cost.

Another family event that we do to keep our traditions and family ties strong.

It is now spring and have run out! I haven't had a chance to take out my barbeque so I've decided to roast my peppers which is just as yummy. Great as a side dish, or a topping in a sandwich. Veal on a bun perhaps?


Roast your pepper until well cooked


Split, remove seeds and peel. Be careful, it's hot!


Slice peppers and wash (to remove remnant seeds)
Season with olive oil, salt and pepper.