Translate

Total Pageviews

Showing posts with label food blogger. Show all posts

Saturday, 11 June 2016

Mama's Makeover! We Moved!


I have moved my site to www.suburbansinglemom.ca

Thanks to you I have re-vamped my blog and moved it to www.suburbansinglemom.ca

Without you this would of never happened! Thank you Thank you Thank you!

I will try my best to post daily my favorite recipes and other exciting stuff!

Follow me on twitter https://twitter.com/


Tuesday, 7 June 2016

Classic Lemon Cranberry Scones with Lemon Glaze

Serve this for breakfast or tea time with the girls, you will not go wrong serving scones! Easy to make, a classic that everyone will love! If you don't have cranberries, blueberries would be just divine! I prefer using dried cranberries, fresh or frozen work just as well.


Lemon Cranberry Scones With Lemon Glaze


Scones

2 cups                  all-purpose flour
1/4 cup                sugar
1 tbsp.                 baking powder
1/4 tsp.                salt
1 tbsp.                 grated lemon zest
1/2 cup                unsalted butter, cold and cut into small pieces
1/2 cup                whipping cream
1/4 cup                2% milk plus extra for brushing
1                          large egg
1 tsp.                   vanilla extract
1 cup                   dried cranberries

Glaze

1 cup                  icing sugar
1 1/2 tbsp.          freshly squeezed lemon juice


Directions

Preheat oven to 375 degrees F and line a baking tray with parchment paper.

Mix flour, sugar, baking powder and salt into a large bowl.

Stir in the lemon zest.

Cut in the butter until the mixture is rough and crumbly but still small pieces of butter are visible. It should be lumpy. Do not over mix.

In a separate bowl, whisk the cream, milk, egg and vanilla together.

Add this to the flour mixture and stir to just bring the dough together.

Flatten the dough out in a rectangle (about 1 cm thick), top with cranberries and press the cranberries into the dough.

Fold the dough over once to incorporate the cranberries.

Reshape into a rectangle. Do not handle the dough too much. You do not want the butter to melt into the flour.

Cut the rectangle into 6 even pieces. Cut it in half down the middle (long side), then into thirds (short side), then cut 6 squares into triangles by cutting squares on the diagonal.

Brush the scones with a little milk and bake for 20 - 25 minutes until lightly browned on top.


Glaze

Whisk the icing sugar and lemon juice together and drizzle over the cooled scones using the whisk or a fork. Let the glaze set for an hour before serving. If glaze is too thick, add water, 1 tsp at a time.


Friday, 3 June 2016

Ricotta For Breakfast

Steel cut oats, greek yogurt parfaits are the latest craze for healthy breakfasts these days. Which is great. But sometimes we need change. Changing it up a bit to make our mornings a little more interesting is needed sometimes.

I've featured my cottage cheese parfaits which are truly delicious.

Ricotta to me is such a delicious cheese. Light, creamy and a nice sweet taste. I usually like buying fresh ricotta from the local farm, or I sometimes make my own at home. Get some ricotta and try this recipe for breakfast.

Ricotta Parfait


Take a mason jar. Add fresh ricotta at the bottom. Layer with fruit of your choice. You can add pumpkin seeds, sunflower seeds, chia seeds, walnuts; the combinations are endless. Keep layering until you reach the top. I like eating the ricotta without it being sweetened. You can add cinnamon, honey or maple syrup to naturally sweeten your parfait.

Close the lid and away you go!

Tuesday, 24 May 2016

Capping Off A Nice Dinner

As you may know, Italians love to eat. We love food. I look at some of my mom's recipes that were passed down to her and I just cannot believe the work that went into preparing it. Fast and easy was not the norm back in the day. Women stayed home, would wake up have their espresso and a little bite and the chores began. They would start their meals from the morning by preparing the tomato sauce, or making homemade pasta. In a later segment I will post on how my mom makes pasta e fagioli (pasta and beans). Pasta e fagioli is another comfort Italian dish which is so delicious but labor intensive. But the joy that my mother had when making the pasta was priceless. She was making it with love. She turns on her Italian music and away she goes.

So when all this delicious food is served and thoroughly enjoyed, we cap off our meal with a nice espresso. It's an automatic given. We finish our meal, clear the table and the espresso machine is on the burner.


Italians do not serve dessert after a meal. Not usually. My mom would always prepare a platter of fruit, serve the coffee and that was it. So sugary indulgences. That was saved for special occasions. My dad likes to add a little Sambuca to his espresso for an extra punch. It adds a nice, sweet, anise taste to tone down the bitterness of the espresso coffee.

It just seems like modern life is so hectic. We wake up, rush to work, come home and rush to make something to eat. I know for myself, I really need to take it down a notch. Just to relax and enjoy the simple things in life like my parents do. It's so hard to do, but I am practicing one day at a time.

Monday, 23 May 2016

Celebrating A Campfire Tradition

Summer is quickly approaching. Time to spend outdoors hosting a barbeque, going up to the cottage.  What fun! Not all of us have the opportunity to sit around a campfire to eat the delicious s'more. Not to worry. I have you covered. This delicious dessert is a tribute to the famous campfire goodie made right in your kitchen. So easy to make. You can prepare this the night before and toast the marshmallows last minute just before serving.


S'Mores Dessert Squares


64 Nilla Wafers, divided

5 tbsp. butter, melted

3 tbsp. sugar

3 1/4 cup cold milk, divided

1 pkg (4 serving size) chocolate instant pudding

2 pkg (4 serving size each) vanilla instant pudding

1 1/2 cups whipping cream

1 1/2 cups mini marshmallows

Preheat oven to 350 degress F. Finely crush 40 of the wafers and place in medium bowl. I used the food processor to do this. Or you can place in a ziplock and crush. Add the melted butter and sugar and mix until well blended. Press firmly onto bottom of 13x9 inch baking pan. Bake for 8 minutes or until lightly browned. Set aside.

Pour 1 1/4 cups of the milk into a medium bowl. Add the chocolate pudding mix. Beat with a whisk for 2 minutes until well blended (I cheat and beat with a mixer fitted with whisk attachment). Spread over crust and top with 24 wafers.

Spread chocolate pudding over crust. Top with wafers


Beat the whipping cream and set aside.


Pour remaining 2 cups milk into a mixing bowl, add the vanilla pudding mixes. Beat for 2 minutes or until well blended. Fold in the whipping cream into the vanilla pudding. Spread over the wafer layer. Refrigerate overnight.


Fold whipping cream into the vanilla pudding


Spread the vanilla/whipped cream mixture over wafers


Preheat broiler just before serving. Top dessert with the mini marshmallows. Broil 1 minute or until lightly browned. I really kept an eye on this and rotated the pan continuously to ensure the marshmallows were evenly browned. You may sprinkle with grated chocolate if you wish.


You may sprinkle with grated chocolate before serving


Serve immediately.

Makes 24 squares.

Sunday, 22 May 2016

Pasta Al Forno

This recipe is one of my family's favorite dishes. Easy to make and a true Italian comfort food. I love making this dish when hosting a dinner party. I make it ahead of time and when I am almost ready to serve, I pop this baby in for about 45 minutes before serving time. Serve this with a side of salad and your dinner will be complete!

I used a rigatoni pasta with this dish. Penne would be a good substitute.

Pasta al forno translated in English means pasta in the oven. It's a classis dish using a meat sauce with your pasta and baking it the oven. I usually dedicate one day on the weekend to cook for the week since my week nights are so hectic. Make this ahead of time and freeze. Pop it out of the freeze the day of and bake when ready.

Pasta Al Forno


Preheat oven to 350 degrees F


Meat Sauce

1             garlic clove, minced

1/2         small onion or 1/4 large onion, finely chopped

2 tbsp.    olive oil

1 lb         extra lean ground beef or veal

1 can       pureed tomato

1 tbsp.     chopped fresh parsley

1 tsp        dried basil

salt and pepper to taste

1 pkg      rigatoni or penne pasta

1/4 cup   grated parmesan cheese

1/2 cup   shredded mozzarella cheese

Sautee the garlic and onion with the olive oil

Add the ground meat and continue to cook until browned


Add your pureed tomato, parsley, basil, salt and pepper continue to cook for about 20 minutes

While your sauce is cooking, cook your pasta according to package directions. The pasta I used was rigatoni

Spoon a layer of the sauce in your baking dish, then top with the cooked pasta. Layer the cooked pasta, adding more sauce and mix until the pasta is well coated. If you have leftover sauce, place in a container and freeze for future dishes.

First add the parmesan and mix. Top with mozzarella cheese, cover with foil and bake in a 350 degrees F oven. for 45 minutes. Half way through the baking process, remove the foil and continue baking.

Buon Apetito!

Saturday, 21 May 2016

Healthy Breakfast Recipes

I am really becoming a fan of steel cut oats. I love trying new flavor combinations. Today's recipe I used fresh lemon and ginger to flavor the oats. Then topped the oats with fresh blueberries and yogurt - Divine!

Lemon Ginger Blueberry Oats

2 1/2 cups                    water
1 cup                            steel cut oats   
1/2 tsp.                         salt
Fresh ginger root I cut off a 1" piece
1                                   zest of lemon
3 tbsp.                          maple syrup or honey
1/2 cup                        vanilla almond milk


Lemon Ginger Blueberry Oats


Add the steel cut oats, zest and ginger root to the boiling water. Add the salt and let boil until cooked (about 20 min). When the oats are almost cooked, add the almond milk. Remove from heat and remove the ginger root. If you feel the oats are not sweet enough, add more maple syrup to suit your taste. Top with blueberries and greek yogurt. The flavor combination of ginger and lemon is quite yummy. When I made this recipe, I was under the weather. My tummy was aching and found this really soothed my tummy. I just omitted the yogurt this time because of my sore tummy.

You can also add pumpkin seeds, nuts or chia seeds.

Make this ahead of time so you have it ready for breakfast for the week.


Breakfast for me is the most important meal of the day. It's in fact, my favorite meal of the day. I am always looking for tasty new recipes to make.

I am always in a rush. If I have nothing to make or I am not in the mood, I zip up a protein shake and take it along with me. It fills me up and gives me quite the energy boost.

In this next recipe I have made a strawberry/banana smoothie with vanilla protein powder.

I also threw in some blueberries and chia seeds. The combinations are endless. And the outcome is simply yummy! If you're using frozen fruits, your smoothie comes out nice and thick. I feel like I'm drinking a milk shake!


You will need a smoothie blender. You can purchase inexpensive ones at Walmart. I bought this particular blender at Walmart. It's from Oster. It was on sale for $29.99. The blender came in different colors to choose from and two of these stylish jugs that you snap onto the blender, lids and a re-usable straw.

Strawberry/Banana Smoothie

1 small banana or 1/2 a large banana
1 cup of chopped strawberries
I added a handful of blueberries
1 scoop of vanilla protein powder
1 cup of unsweetened vanilla almond milk

You can add 1 tsp of chia seeds if you would like.

Blend everything together and off you go!

This blender kit comes with lids that you can snap on and feed the straw through to prevent spilling.


Friday, 20 May 2016

Carrot Muffins

When my children were small, oddly enough they loved vegetables. But as they got older, green food became "not cool". They started not to eat fruits and vegetables like they used to. So, to improvise, I would sneak it in their food. I would puree the vegetables in soup so they would not see the chunks or would make healthy snack items. One of the items I usually make are these carrot muffins. Moist and so tasteful, it has become a hit here in our household. I use whole wheat flour for extra fibre. If you do not like the taste of whole wheat, all purpose flour can be used.


Carrot Muffins


Preheat oven to 350 degrees F

one or two 12-cup muffin pans, greased or lined with paper liners

2 cups whole wheat flour

1 1/4 cups brown sugar

3/4 cups raisins

1/2 cup chopped walnuts

2 tsp baking soda

1 1/2 tsp. cinnamon

1/2 tsp nutmeg

1/2 tsp salt

2 1/2 cups peeled and grated carrots

3 eggs

3/4 cup vegetable oil

Combine the flour, sugar, raisins, walnuts, baking soda, cinnamon, nutmeg, salt in a large bowl. Stir well.

Beat carrots, eggs and oil. Add to dry ingredients all at once, stirring just until moistened. Spoon batter into prepared muffin pans, filling three quarters full for regular-size or full for large-size muffins.

Bake for 20 minutes for regular muffins or 27 minutes for large muffins or until tops spring back when lightly touched.

Variations:
Omit nuts if desired. My kids hate nuts so I make carrot muffins without the nuts.

Switch the carrots with shredded zucchini.


A healthy breakfast alternative. My son

Thursday, 19 May 2016

Cheese Biscuits

I love cheese and especially in biscuits! Serve with tea, some grapes or a nice glass of wine. I cannot stop at one! Make little bite size sandwiches with these cheese morsels. I know when I bake a batch, the biscuits disappear quickly. I love to serve these as a finger food if I'm hosting an event.

Cheese Biscuits


2-1/4 cups all-purpose flour
2 tbsp. granulated sugar
1 tbsp. baking powder
1/2 tsp salt
1/2 cup butter, cubed
1 cup shredded old cheddar cheese
1 cup milk
1 egg, lightly beaten (to brush the tops)


Preheat oven to 425 degrees F.

In a large bowl, whisk together flour, sugar, baking powder and salt. Using pastry blender (or two dinner knives), cut in butter until mixture resembles course crumbs.

Stir in cheese. Pour milk over top and stir with fork to make soft, slightly sticky ragged dough.

With floured hands, form into a large ball. Turn dough onto floured surface. With lightly floured hands, knead gently 10 times.


Form dough and knead gently 10 times

Gently pat into 1/2 inch (1 cm) thick round. Using a 2 inch (5 cm) floured cutter, cut into rounds.

cut into 2 inch round (1/2" thick)

Place on ungreased baking sheet. Gather up scraps and repeat dough; cut more rounds, pressing remaining scraps into final biscuit.

Place on ungreased baking sheet

Brush tops of biscuits with egg. Bake in centre of 425 degrees F oven (220 degrees C) until golden, about 15 minutes.

Brush top with egg wash


Let cool on rack.

Enjoy!

Wednesday, 18 May 2016

Rice Ring With Meat Sauce Stuffing

This is a true crowd pleaser if serving at a party or a dinner. It's literally dinner in a pan. Serve with an arugula salad and dinner is done!

Rice Ring Stuffed With Meat Sauce


Meat Sauce


1 bottle or can of tomato puree
1/2 onion, finely chopped
1 garlic clove, minced
2 tsp chopped parsley
1 tbsp. olive oil
450 gr (1 lb) ground beef
1 cup frozen peas
salt and pepper to taste


Meat Sauce


Sautee the onion, garlic until translucent. Add ground beef and sautee until fully cooked. Add the tomato sauce, parsley and let simmer on med/low heat for about 40 minutes stirring the sauce often. Add peas  and let cook. Set aside.


For the rice ring you will need to boil 6 cups of water with salt and 3 cups of Arborio rice.

In the meantime prepare your bundt pan.

Butter your bundt pan and coat with bread crumbs, I used the Italian seasoning bread crumbs

Once your Arborio rice has cooked and cooled down, add 1 cup of parmesan cheese and two eggs to your rice. Blend thoroughly.

Wet Hands and Form Rice in Pan


Fill With Meat Sauce and add chunks of mozzarella (about half a ball)

Cover with remaining rice. Bake at 350 degrees F for 45 minutes


Let cool for about 15 minutes before slicing. Serve with remaining sauce.


Sunday, 15 May 2016

Cheesy Pancakes


There's one thing I love about Sunday morning is breakfast! My most favorite meal of the day! I made these pancakes this morning for my family. It is moist and oh so delicious. The pancakes secret ingredient is cottage cheese which makes the pancakes so moist. I served the pancakes with a blueberry preserve that I make when it's blueberry season. Maple syrup is just as delicious.

Pancakes Made With Pressed Cottage Cheese


Cheesy Pancakes

1 lb of pressed cottage cheese
1 1/2 cups of all purpose flour
2 eggs
pinch of salt
1/4 cup of raisins
1/4 cup of vegetable oil
1 tsp cinnamon
1/4 tsp nutmeg

Mix thoroughly the cheese, eggs and salt.
Add the rains and mix again.
Slowly add the flour and mix. Mixture should be sticky.
Add the dough to a floured surface and cut into balls approx. 2 inches and then flatten.
Add butter to a griddle and cook the pancakes.

Serve with fruit preserves or maple syrup.

Friday, 13 May 2016

Decadent Ice Cream Pie


If you're intimidated with baking, why not try this recipe out. A delicious ice cream pie that is easy to make and great to make ahead for your dinner or event. Or just make this and savor for a cheat night!

Why not serve this at your next barbeque?


Vanilla Chocolate Crunch Ice Cream Pie

Crust:

1 1/4 cup Oreo Cookie Crumbs
1/4 cup melted butter

Press on bottom of 9 inch pie plate. Bake at 350 degrees F for 10 minutes. Remove from oven and let cool completely.

Pie Filling:

1 cup (6 oz) semi sweet chocolate squares, chopped

4 tbsp. unsalted butter

1/4 cup heavy (double cream)

2 tbsp. light corn syrup

1 cup confectioners (icing) sugar, sifted

1 tsp. vanilla extract

1/2 cup Skor bits

1L tub of premium vanilla ice cream

Melt the chocolate, butter. cream and corn syrup on top of a double broiler. Set over but barely touching the simmering water. Stir constantly until chocolate has melted.

Add the sugar and vanilla to the chocolate mixture and mix well. Reserve 1/2 cup of the chocolate for the pie topping. Spread the remaining on the cookie crust. Sprinkle with half of the Skor bits. Refrigerate for 1 hour.

In a large bowl, using a paddle attachment, beat the ice cream with an electric mixer until spreadable but not runny. Pour immediately into the prepared pie plate and freeze until firm (about 2 hours).

Microwave the chocolate in 30 second intervals until spreadable. Remove, stirring quickly and spread onto the pie. Sprinkle with the remaining Skor bits and freeze until completely firm before serving. If you are making this ahead, remove from freezer about 10 minutes before serving to make cutting easier.

* If you do not like toffee bits, substitute for chopped, roasted almonds.


Wednesday, 11 May 2016

Vegetable Beef Stew

I've been craving a good stew for a very long time. When I plan to make it the kids tend to sway me to make something else. Last night I decided to make this stew and it was vanished before you knew it! I like to make a little extra for lunch the next day, but unfortunately there was nothing left. The aroma of this stew is truly intoxicating. Even though stew is considered a winter comfort food, I love making this dish using farm fresh vegetables of the season. If you're a vegetarian, skip the meat. It's just as good.

Meat and Vegetable Stew With Brown Rice

Meat and Vegetable Stew With Brown Rice


1 can (14oz) pureed tomato or use fresh, tomato
250 gr. stewing beef
1 zucchini, chopped
2 small potatoes, peeled and cubed
3/4 cup mushrooms, sliced
1 bell pepper sliced into strips
1/2 onion finely chopped
1 tsp fresh parsley chopped
1/3 cup red wine
4 tbsp. olive oil
salt and pepper to taste

Steamed brown rice.

Directions:

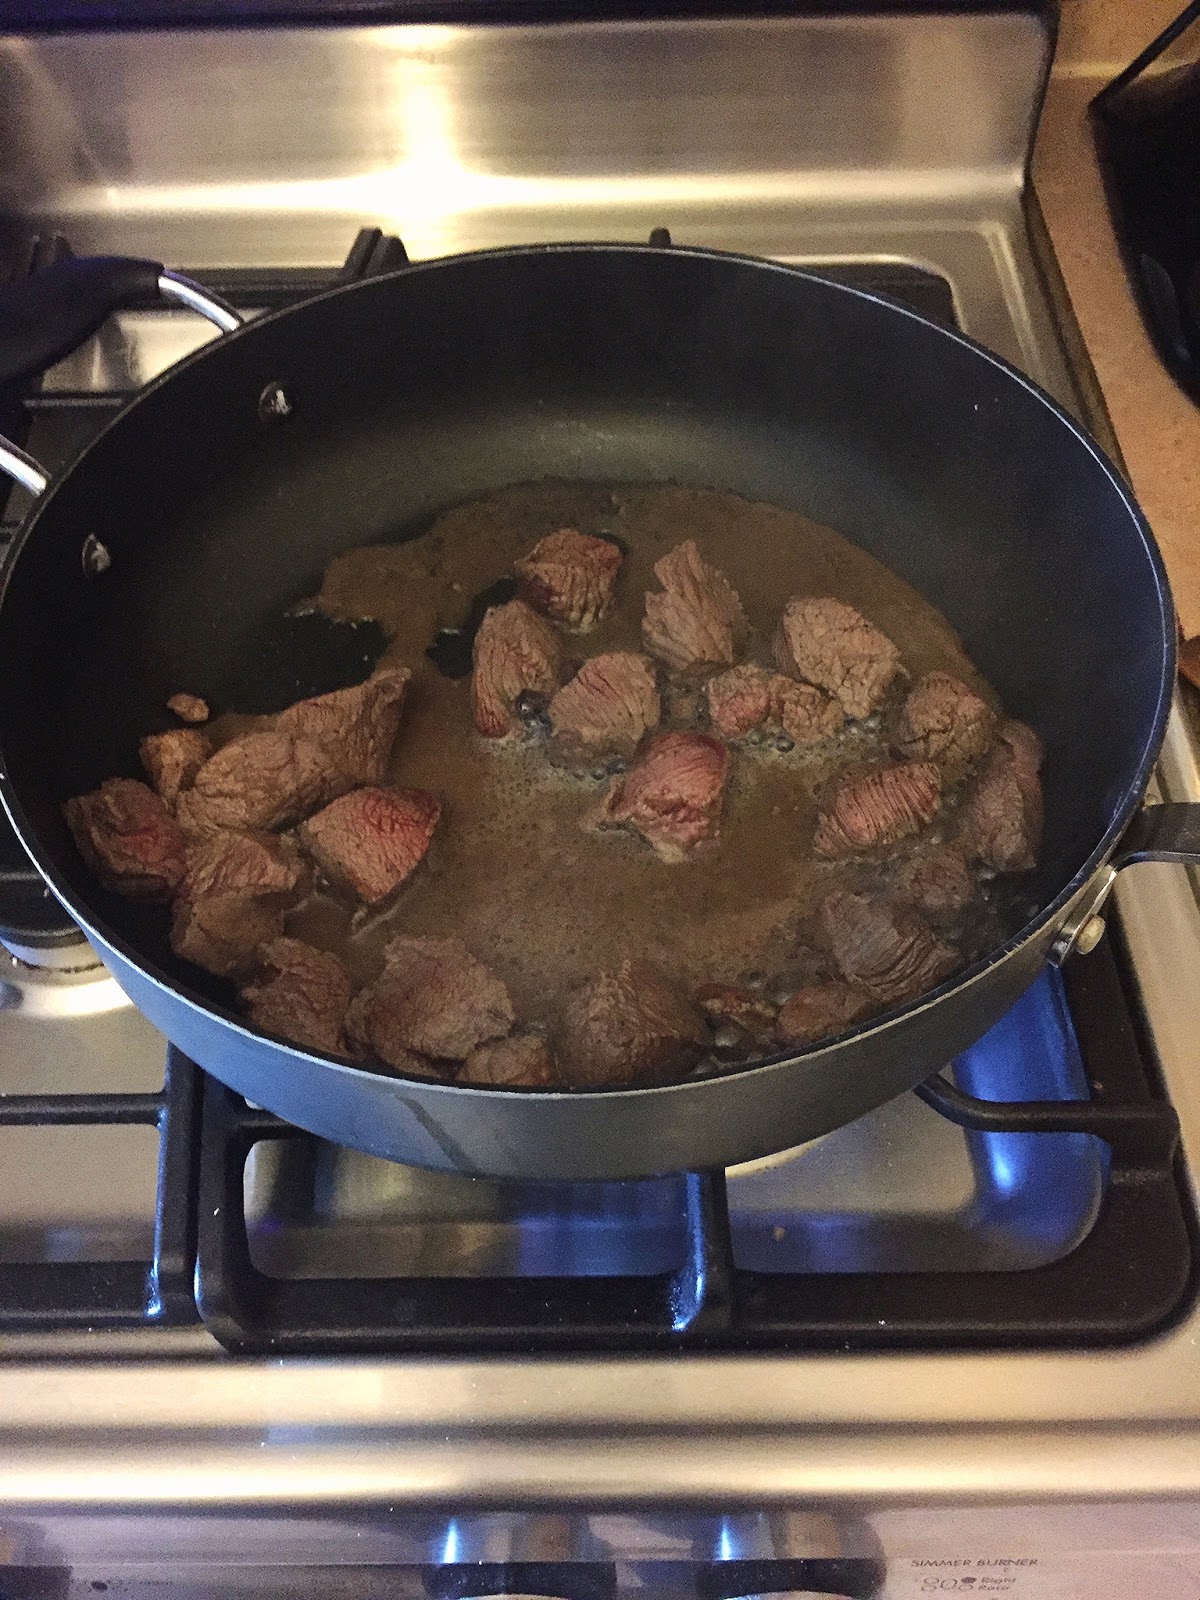
Sautee the meat and chopped onion with 2 tbsp. of olive oil until meat has browned. Add the red wine and let simmer for about 5 minutes. Add the potato, bell pepper, mushrooms and zucchini. Stir until softened. Now add the tomato, remainder 2 tbsp. of olive oil and parsley. Add about 1/2 tsp. each of salt and pepper. Taste and add more if desired. Slowly simmer the stew for a good 30 minutes or until sauce has thickened. Serve over steamed rice or eat it on it's own.

Meat sautéing in wine

Stew cooking with sauce 


Tuesday, 10 May 2016

Polenta Fries

Polenta considered northern Italy's peasant food back in the day has now become a gourmet item. Even though my parents are from the central part of Italy, polenta was served particularly in the winter months. My mother would serve hot polenta with a delicious tomato sauce topped with homemade sausages.

Today I converted this plain corn flour into delicious fries. The dipping sauce is made of homemade tomato sauce. Adding a little hot pepper would add a little zing to this dish.


Polenta Fries Served With Spicy Tomato Sauce


Polenta Fries

Preheat Oven to 425 degrees F

4 cups water, salted
1 cup polenta flour (cornmeal)
1 tsp dried rosemary
1/4 cup parmesan cheese
Pinch salt and pepper

Boil the water. Add salt and polenta stirring constantly. For about 20 minutes or until mixture has thickened.


Once the mixture has thickened, remove from heat and add the rosemary and parmesan. Stir until well incorporated. Spread onto a greased baking sheet.


Refrigerate the polenta until completely cooled. For about an hour. In the meantime, you can start making the tomato sauce.

1 can of tomato puree (14 ounces)
2 tsp olive oil
1 garlic clove
1/2 onion
1 tsp salt
1 tsp parsley
1/2 tsp hot pepper flakes

Simmer all the ingredients above in a pot on medium heat. Cook for about 20-30 minutes.

While the sauce is cooking, you can grab the polenta. Remove from pan and start slicing the polenta into fries. I dipped the wedges into rice flour to add more crispiness to the fries. You can use regular flour if you wish.


Bake the fries for about 25-30 minutes or until crispy; rotating the pan halfway through. Remove and sprinkle with more parmesan if you wish.

Healthy and gluten free!

Monday, 9 May 2016

A Natural Version to The Peanut Butter Cup

There's one chocolate that I absolutely love which is Reeces Peanut Butter Cups. The delicious chocolate complemented by the peanut butter is truly heaven. But not exactly great for my abs, butt and thighs. So I'll switch it up with this recipe. I'll pretend play with this healthy rendition of the peanut butter cup. Just as good but it is actually good for you. When you have that sugary, chocolate craving, keep a stash of these on hand. Even better eaten out of the freezer.

Using dark chocolate, natural peanut butter and banana. It truly makes a delicious treat. 

Banana Peanut Butter Cups


You will need:

1 banana, sliced

1/4 cup natural peanut butter or almond butter

2 tsp coconut oil

100g dark chocolate bar

small paper candy cups

Blend 1 tsp of the coconut oil with the peanut butter in a bowl and set aside

Melt the dark chocolate and 1 tsp of the coconut oil

Drop the chocolate in the cup approx. 1/2 tsp. add banana, then layer the peanut butter and top with chocolate.

I place the cups in mini tart tin tray to keep the shape of the cups.

Freeze for 20 minutes.

Store in an air tight container.

Sunday, 8 May 2016

A Big Happy Mother's Day to All of You!

I want to personally wish all mothers a Happy Mother's Day. We would not be here without you! Muah! I dedicate this blog to my mother. She has inspired me. From a little girl cooking/baking, entertaining, arts and crafts, housekeeping etc. has been taught to me by my mother. And I could not thank her enough!

Today we all went out for breakfast to celebrate this occasion. As I am writing this I cannot breathe for how full I feel. I made myself some detox water and would like to share with you! I always keep flavored water in the fridge. Just to add some flavor to the water.

Mango Ginger Water


Mango Ginger Water

1/2 cup mango

a slice of ginger

fill a water bottle or mason jar with water or sparkling water

Let it infuse for 2-4 hours


Lemon Blueberry Water


Lemon/Blueberry Water


Add a 1/4 cup of blueberries and a few wedges of lemon into your mason jar or canteen and fill with water or sparkling water. Let stand in the refrigerator for 2-4 hours to let the flavors infuse into the water.

Saturday, 7 May 2016

Chocolate Toffee Cookies

This cookie will not disappoint. I love to bake. When I want to say thank you, send well wishes etc., I make this recipe. I usually wrap this up in a nice bowl or pretty box and present as a gift. You cannot stop at one. The added Skor bits complete this cookie.

Chocolate Toffee Cookies


Preheat oven to 375 degrees F


4 cups all-purpose flour
1 tsp baking powder
1 tsp baking soda
1 1/2 cups (3 sticks) butter, softened
1 1/4 cup granulated sugar
1 1/4 cup packed brown sugar
2 large eggs
1 tbsp. vanilla extract
1 cup semi-sweet chocolate chips
1 cup white chocolate chips
1/2 cup skor bits

Combine flour, baking powder and baking soda in medium bowl. Beat butter, granulated sugar and brown sugar in large mixer bowl until creamy. Beat in eggs and vanilla extract. Gradually beat in flour mixture. Stir in chocolate and skor bits. Drop dough by tablespoonfuls on ungreased cookie sheets.

Bake for 12-14 minutes or until golden brown. Cool.


Thursday, 5 May 2016

Happy Cinco de Mayo!

Happy Cinco de Mayo to my Mexican friends! I wish you all the best on this festive day! I made this dip to commemorate this special day! It's easy to make and so delicious! A true crowd pleaser!


Salsa Layered Dip

Salsa Dip

1st Layer
1 8oz pkg. cream cheese
5 tbsp. sour cream

Whip together and spread over the bottom of a quiche type dish

2nd Layer
Use your favorite salsa. Spread it over the bottom layer.

3rd Layer
1 green pepper chopped
1 tomato chopped (discard juice)
2 green onions chopped

Sprinkle the chopped items over other two layers and lightly press it into the first 2 layers.

4th Layer
Grate about 10oz of old cheddar cheese to cover dip.

Serve with nachos.

Monday, 2 May 2016

Orecchiette Con Rapini a Poor Man's Dish

Pasta with rapini (broccoli rabe) is my family's all time favorite. For some reason my children are not fond of tomato sauce pasta. They prefer this dish and I'm happy for that because it's so quick and easy to make. Considered a poor man's dish in the Italian culture this dish is truly a comfort food in our home. I purchase rapini a few bunches at a time. I then wash, trim the ends, cut and boil. Once cooled I  place the rapini in baggies and freeze so it's ready when I need it. I also sauté rapini with a bit of olive oil, salt and garlic and serve it as a side dish with meat.

If you do not have orecchiette, penne would be a good substitute.

Orecchiette Con Rapini


Pasta Con Rapini

1 bunch                 rapini (broccoli rabe) boiled and chopped**
2                           garlic cloves, minced
1 pkg  (450 gr)     orecchiette or penne
4 tbsp.                  olive oil
1 tsp                     salt

Boil the pasta in salted water until al dente. Remove once cooked and drain water reserving 4 tbsp. of the water.
Boil the pasta until al dente or the texture suits your palette


Sautee the minced garlic with the olive oil until light golden. Add the rapini and cook for a good 10 minutes. Add salt to the rapini and stir.

Sautee the rapini with olive oil and garlic


Add the pasta and reserved water to the rapini and cook for another 15 minutes. Remove from heat. If you feel the pasta is a little dry, add more olive oil, stir the pasta mixture to evenly distribute.


Add the pasta and reserved water to the rapini


Serve with parmesan cheese.

**boil the rapini for 30 minutes or until tender. I like to boil the rapini really well to get rid of the bitterness of the vegetable.


Buon Appetito!